前言
前面分析渲染流程的时候看到了 SchedulerBinding、RendererBinding 等各种 Binding 以及 WidgetTree、ElementTree 等四种 Tree。那么这些 Binding 是什么时候被初始化的,这些 Tree 的根部在哪里,它们的叶子节点什么时候绑定到根部的,让我们来看下。
runApp
runApp 是整个程序的入口,我们从它开始,代码如下:
void runApp(Widget app) {
  WidgetsFlutterBinding.ensureInitialized()
    ..attachRootWidget(app)
    ..scheduleWarmUpFrame();
}
可以看出它主要做了三件事:
- 保证初始化
- 把 app Widget attach 到 Root Widget 上。
- 请求一个热身帧
前两个对应着本文的主题,我们来看一下他们。
ensureInitialized
WidgetsFlutterBinding.ensureInitialized
static WidgetsBinding ensureInitialized() {
    if (WidgetsBinding.instance == null)
      WidgetsFlutterBinding();
    return WidgetsBinding.instance;
  }
这里只是初始化了 WidgetsFlutterBinding,而 WidgetsFlutterBinding 是什么?
/// This is the glue that binds the framework to the Flutter engine.
class WidgetsFlutterBinding extends BindingBase with GestureBinding, ServicesBinding, SchedulerBinding, PaintingBinding, SemanticsBinding, RendererBinding, WidgetsBinding {
这是一个类继承了 BindingBase 并 Mixin 其他的各种 Binding,这些 Binding 就是本文的目标之一。 另外注释中还有说明:
WidgetsFlutterBinding 是粘合了 framework 和 Flutter engine 的胶水。
Mixin 的这些 Bindings 也继承了 BindingBase,我们先来看下它。
abstract class BindingBase {

  BindingBase() {
    initInstances();
  }

  ui.Window get window => ui.window;

  @protected
  @mustCallSuper
  void initInstances() {
  }
   ...
}
其中有一个 getter 它返回的是一个 Window 对象,注释中有说明:
一系列的 bindings 扩展了 BindingBase,每一个 binding 都定义了和 window 交互的行为。
构造方法中调用了 initInstances() ,因为 BindingBase 是个抽象类,这个方法的实现在他的子类里,我们来找几个熟悉的看一下。
GestureBinding
GestureBinding 手势绑定:
mixin GestureBinding on BindingBase implements HitTestable, HitTestDispatcher, HitTestTarget {
  @override
  void initInstances() {
    super.initInstances();
    _instance = this;
    window.onPointerDataPacket = _handlePointerDataPacket;
  }
在 initInstances 主要是给 window 设置了一个回调函数,这个 binding 主要是处理点击事件的。 事件处理、事件分发我们后续再学习。
ServicesBinding
SchedulerBinding
第三个是 SchedulerBinding:
mixin SchedulerBinding on BindingBase, ServicesBinding {
  @override
  void initInstances() {
    super.initInstances();
    _instance = this;
    window.onBeginFrame = _handleBeginFrame;
    window.onDrawFrame = _handleDrawFrame;
    SystemChannels.lifecycle.setMessageHandler(_handleLifecycleMessage);
    readInitialLifecycleStateFromNativeWindow();

      window.onReportTimings = (List<FrameTiming> timings) {
        for (FrameTiming frameTiming in timings) {
          frameNumber += 1;
          _profileFramePostEvent(frameNumber, frameTiming);
        }
      };
    }
  }
这个之前分析 build 阶段的时候看到过,它向 window 注册了两个回调 handleBeginFrame 和 handleDrawFrame,用于处理 Transient 和 Persistent 回调。 另外还注册了 App 生命周期回调。
这里创建了一个 ImageCache,不过没弄明白它是做什么的。
RendererBinding
RendererBinding:
mixin RendererBinding on BindingBase, ServicesBinding, SchedulerBinding, GestureBinding, SemanticsBinding, HitTestable {
  @override
  void initInstances() {
    super.initInstances();
    _instance = this;
    _pipelineOwner = PipelineOwner(
      onNeedVisualUpdate: ensureVisualUpdate,
      onSemanticsOwnerCreated: _handleSemanticsOwnerCreated,
      onSemanticsOwnerDisposed: _handleSemanticsOwnerDisposed,
    );
    window
      ..onMetricsChanged = handleMetricsChanged
      ..onTextScaleFactorChanged = handleTextScaleFactorChanged
      ..onPlatformBrightnessChanged = handlePlatformBrightnessChanged
      ..onSemanticsEnabledChanged = _handleSemanticsEnabledChanged
      ..onSemanticsAction = _handleSemanticsAction;
    initRenderView();
    _handleSemanticsEnabledChanged();
    addPersistentFrameCallback(_handlePersistentFrameCallback);
    _mouseTracker = _createMouseTracker();
  }
这里初始化了 PipelineOwner,同时向 window 注册了一系列回调:屏幕尺寸、亮度变化等。 这里还初始化了 RenderView,就是 RenderObject tree 的根。 还添加了一个 _handlePersistentFrameCallback,这个回调比较重要,渲染流程中的 layout、paint 都是在这个回调里启动的。
WidgetsBinding
最后是 WidgetsBinding:
/// The glue between the widgets layer and the Flutter engine.
mixin WidgetsBinding on BindingBase, SchedulerBinding, GestureBinding, RendererBinding, SemanticsBinding {
  @override
  void initInstances() {
    super.initInstances();
    _instance = this;
    buildOwner.onBuildScheduled = _handleBuildScheduled;
    window.onLocaleChanged = handleLocaleChanged;
    window.onAccessibilityFeaturesChanged = handleAccessibilityFeaturesChanged;
    SystemChannels.navigation.setMethodCallHandler(_handleNavigationInvocation);
    SystemChannels.system.setMessageHandler(_handleSystemMessage);
    FlutterErrorDetails.propertiesTransformers.add(transformDebugCreator);
  }
粘合 Widget layer 和 Flutter engine 的胶水。 这里创建了 BuildOwner 并给他注册了一个回调,这里又一个 Owner。之前我们已经见到了 PipelineOwner,这两个 Owner 非常重要。
- BuildOwner 是 widgets framework 的管理类,跟踪哪些 widgets 需要 rebuild。它被 WidgetsBinding 持有,主要作用于渲染流程的 build 阶段。
- PipelineOwner 它管理者渲染管道,被 RendererBinding 持有,主要作用在渲染的 layout、paint 等阶段。
至此,runApp 所做的三件事我们分析完了第一件,下面看第二件。
attachRootWidget
void attachRootWidget(Widget rootWidget) {
    _renderViewElement = RenderObjectToWidgetAdapter<RenderBox>(
      container: renderView,
      debugShortDescription: '[root]',
      child: rootWidget,
    ).attachToRenderTree(buildOwner, renderViewElement);
  }
首先创建一个 RenderObjectToWidgetAdapter ,它是一个 Widget,传入的参数有 RenderObject 的根节点 renderView 和 runApp 带过来的 Widget。
class RenderObjectToWidgetAdapter<T extends RenderObject> extends RenderObjectWidget {

  RenderObjectToWidgetAdapter({
    this.child,
    this.container,
    this.debugShortDescription,
  }) : super(key: GlobalObjectKey(container));

  final Widget child;

  final RenderObjectWithChildMixin<T> container;

  @override
  RenderObjectToWidgetElement<T> createElement() => RenderObjectToWidgetElement<T>(this);

  @override
  RenderObjectWithChildMixin<T> createRenderObject(BuildContext context) => container;

  RenderObjectToWidgetElement<T> attachToRenderTree(BuildOwner owner, [ RenderObjectToWidgetElement<T> element ]) {
    if (element == null) {
      owner.lockState(() {
        //创建 Element root
        element = createElement();
        element.assignOwner(owner);
      });
      owner.buildScope(element, () {
        element.mount(null, null);
      });
    } else {
      element._newWidget = this;
      element.markNeedsBuild();
    }
    return element;
  }
RenderObjectToWidgetAdapter 是连接 RenderObject 和 Element 的桥梁。 RenderObjectToWidgetAdapter 其实就是 Widget 树的根,它的 createElement() 会创建 Element tree 的根 RenderObjectToWidgetElement,而 RenderObject 的根就是 RenderView。
attachToRenderTree 创建了一个 Element ,然后 element mount 的时候会触发 widget 树的构建。
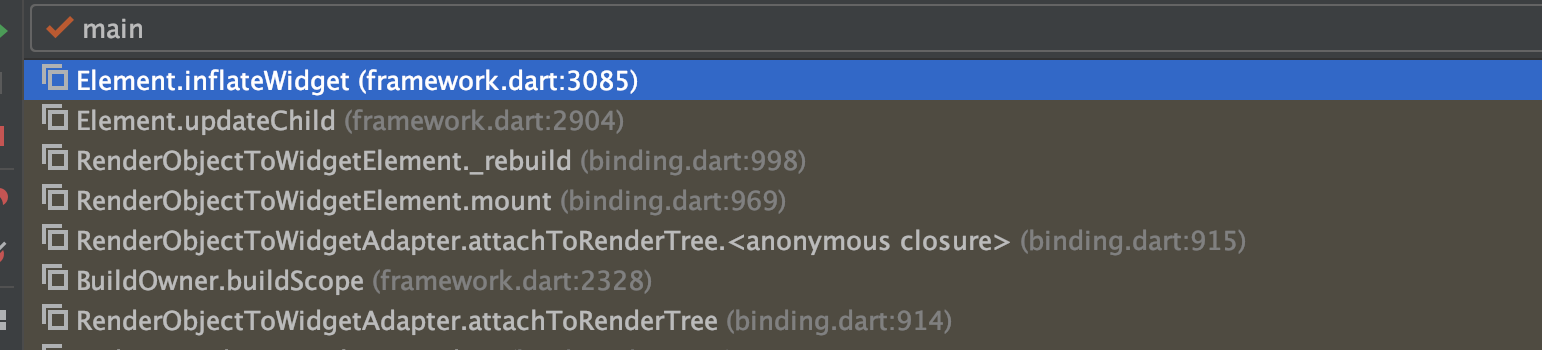
上图是方法栈。
@protected
  Element inflateWidget(Widget newWidget, dynamic newSlot) {
    ...
    final Element newChild = newWidget.createElement();
    assert(() { _debugCheckForCycles(newChild); return true; }());
    newChild.mount(this, newSlot);
    return newChild;
  }
Widget build 的时候会触发 Element 的创建调用它的 mount 方法。而 mount 会做三件事: 1. Element 和他的父 Element 绑定
void mount(Element parent, dynamic newSlot) {
    ...
    _parent = parent;
    _slot = newSlot;
    _depth = _parent != null ? _parent.depth + 1 : 1;
    _active = true;
    if (parent != null) // Only assign ownership if the parent is non-null
      _owner = parent.owner;
    ...
  }
2. updateChild 让 Widget 的 build 沿着整个树走下去
 @override
  void mount(Element parent, dynamic newSlot) {
    super.mount(parent, newSlot);
    _child = updateChild(_child, widget.child, null);
  }
3. 创建 RenderObject 并将它跟父节点绑定 这个是可选,只有 RenderObjectElement 才会执行这一步。
@override
  void mount(Element parent, dynamic newSlot) {
    super.mount(parent, newSlot);
    _renderObject = widget.createRenderObject(this);
    attachRenderObject(newSlot);
    _dirty = false;
  }
小结
- inflateWidget 的时候创建了 Element 对象
- Element 在 mount 时和它的父节点绑定。
- 如果是 RenderObjectElement mount 时还会创建 RenderOjbect 并将 RenderOjbect 和他的父节点绑定。
至此,我们已经找到了三个树的根以及这三棵树的构建过程,还剩最后一棵 layer tree。
layer tree
RootLayer 的创建其实是在 RenderView 中,代码如下:
Layer _updateMatricesAndCreateNewRootLayer() {
    _rootTransform = configuration.toMatrix();
    final ContainerLayer rootLayer = TransformLayer(transform: _rootTransform);
    rootLayer.attach(this);
    assert(_rootTransform != null);
    return rootLayer;
  }
可以看到它是一个 TransformLayer,在他的父类的父类 ContainerLayer 里有一个链表用于存储孩子节点。
而 child layer 的创建是在 _repaintCompositedChild 中:
static void _repaintCompositedChild(
    RenderObject child, {
    bool debugAlsoPaintedParent = false,
    PaintingContext childContext,
  }) {

    OffsetLayer childLayer = child._layer;
    if (childLayer == null) {
      // 创建 layer
      child._layer = childLayer = OffsetLayer();
    } else {

      childLayer.removeAllChildren();
    }
    ...
  }
child layer 和父节点绑定是在 _compositeChild 中:
 void _compositeChild(RenderObject child, Offset offset) {

    // Create a layer for our child, and paint the child into it.
    if (child._needsPaint) {
      repaintCompositedChild(child, debugAlsoPaintedParent: true);
    } else {
    childOffsetLayer.offset = offset;
    appendLayer(child._layer);
  }


  @protected
  void appendLayer(Layer layer) {
    assert(!_isRecording);
    layer.remove();
    _containerLayer.append(layer);
  }
以上,就不总结了。