前文我们分析了 Flutter 渲染流程中的 Build 和 layout,今天我们来看 paint。
mark 阶段
在 _layoutWithoutResize 的最后会调用 markNeedsPaint() 我们从这个方法说起。
RenderObject.markNeedsPaint()
void markNeedsPaint() {
    //如果已经被标记,返回
    if (_needsPaint)
      return;
    _needsPaint = true;
    //判断 isRepaintBoundary
    if (isRepaintBoundary) {
      if (owner != null) {
        // 如果 isRepaintBoundary 将自己添加到 pipelineOwner 中的 _nodesNeedingPaint
        owner._nodesNeedingPaint.add(this);
        owner.requestVisualUpdate();
      }
    } else if (parent is RenderObject) {
      //向上找到 isRepaintBoundary
      final RenderObject parent = this.parent;
      parent.markNeedsPaint();
    } else {

      //如果自己是根节点(RenderView)需要自己 paint
      // 不需要添加到 _nodesNeedingPaint 数组里
      if (owner != null)
        owner.requestVisualUpdate();
    }
  }
将需要绘制图层中的根节点添加到 _nodesNeedingPaint 数组之后,标记工作就完成了,后续又会回到 RendererBinding 中的 drawFrame 继续向下执行。
RendererBinding.ondrawFrame()
 @protected
  void drawFrame() {
    assert(renderView != null);
    pipelineOwner.flushLayout();
    pipelineOwner.flushCompositingBits();
    pipelineOwner.flushPaint();
    renderView.compositeFrame(); // this sends the bits to the GPU
    pipelineOwner.flushSemantics(); // this also sends the semantics to the OS.
  }
flushCompositingBits 我们后面再看,今天先看 flushPaint()。
paint 阶段
RendererBinding.flushPaint()
 void flushPaint() {

    try {
      final List<RenderObject> dirtyNodes = _nodesNeedingPaint;
      _nodesNeedingPaint = <RenderObject>[];
      // 首先对节点做一个排序,较深的节点在前
      for (RenderObject node in dirtyNodes..sort((RenderObject a, RenderObject b) => b.depth - a.depth)) {
        if (node._needsPaint && node.owner == this) {
          if (node._layer.attached) {
            PaintingContext.repaintCompositedChild(node);
          } else {
            node._skippedPaintingOnLayer();
          }
        }
      }
    } finally {

    }
  }
这里首先会对需要重绘的节点做一个排序,跟之前阶段不同的是,这次是较深的节点在前。之后会判断当前节点的_layer属性是否处于attached的状态。如果_layer.attached为true的话调用PaintingContext.repaintCompositedChild(node);去做绘制,否则的话调用node._skippedPaintingOnLayer()将自身以及到上层绘制边界之间的节点的_needsPaint全部置为true。这样在下次_layer.attached变为true的时候会直接绘制。
RelayoutBoundary 与 layer
根据 GDD China ’18 在 ios 中每个 UIView 都有一个单独的图层,这可能会使用较高的内存,而 Android 整个空间树使用一个图层,一个控件的改变可能会导致整个空间树的重绘。Google 为了提高 Flutter 的渲染效率,引入了多图层机制:
- Flutter 试着让应用的自然分界线都形成自己的图层。
- 开发者可以使用 RepaintBoundary 自定义一些图层。
自然分界线都形成自己的图层这个应该跟 Element 和 RenderObject 的类型有。
多图层机制可以从以下两点提高渲染效率:
1、 降低遍历出发点
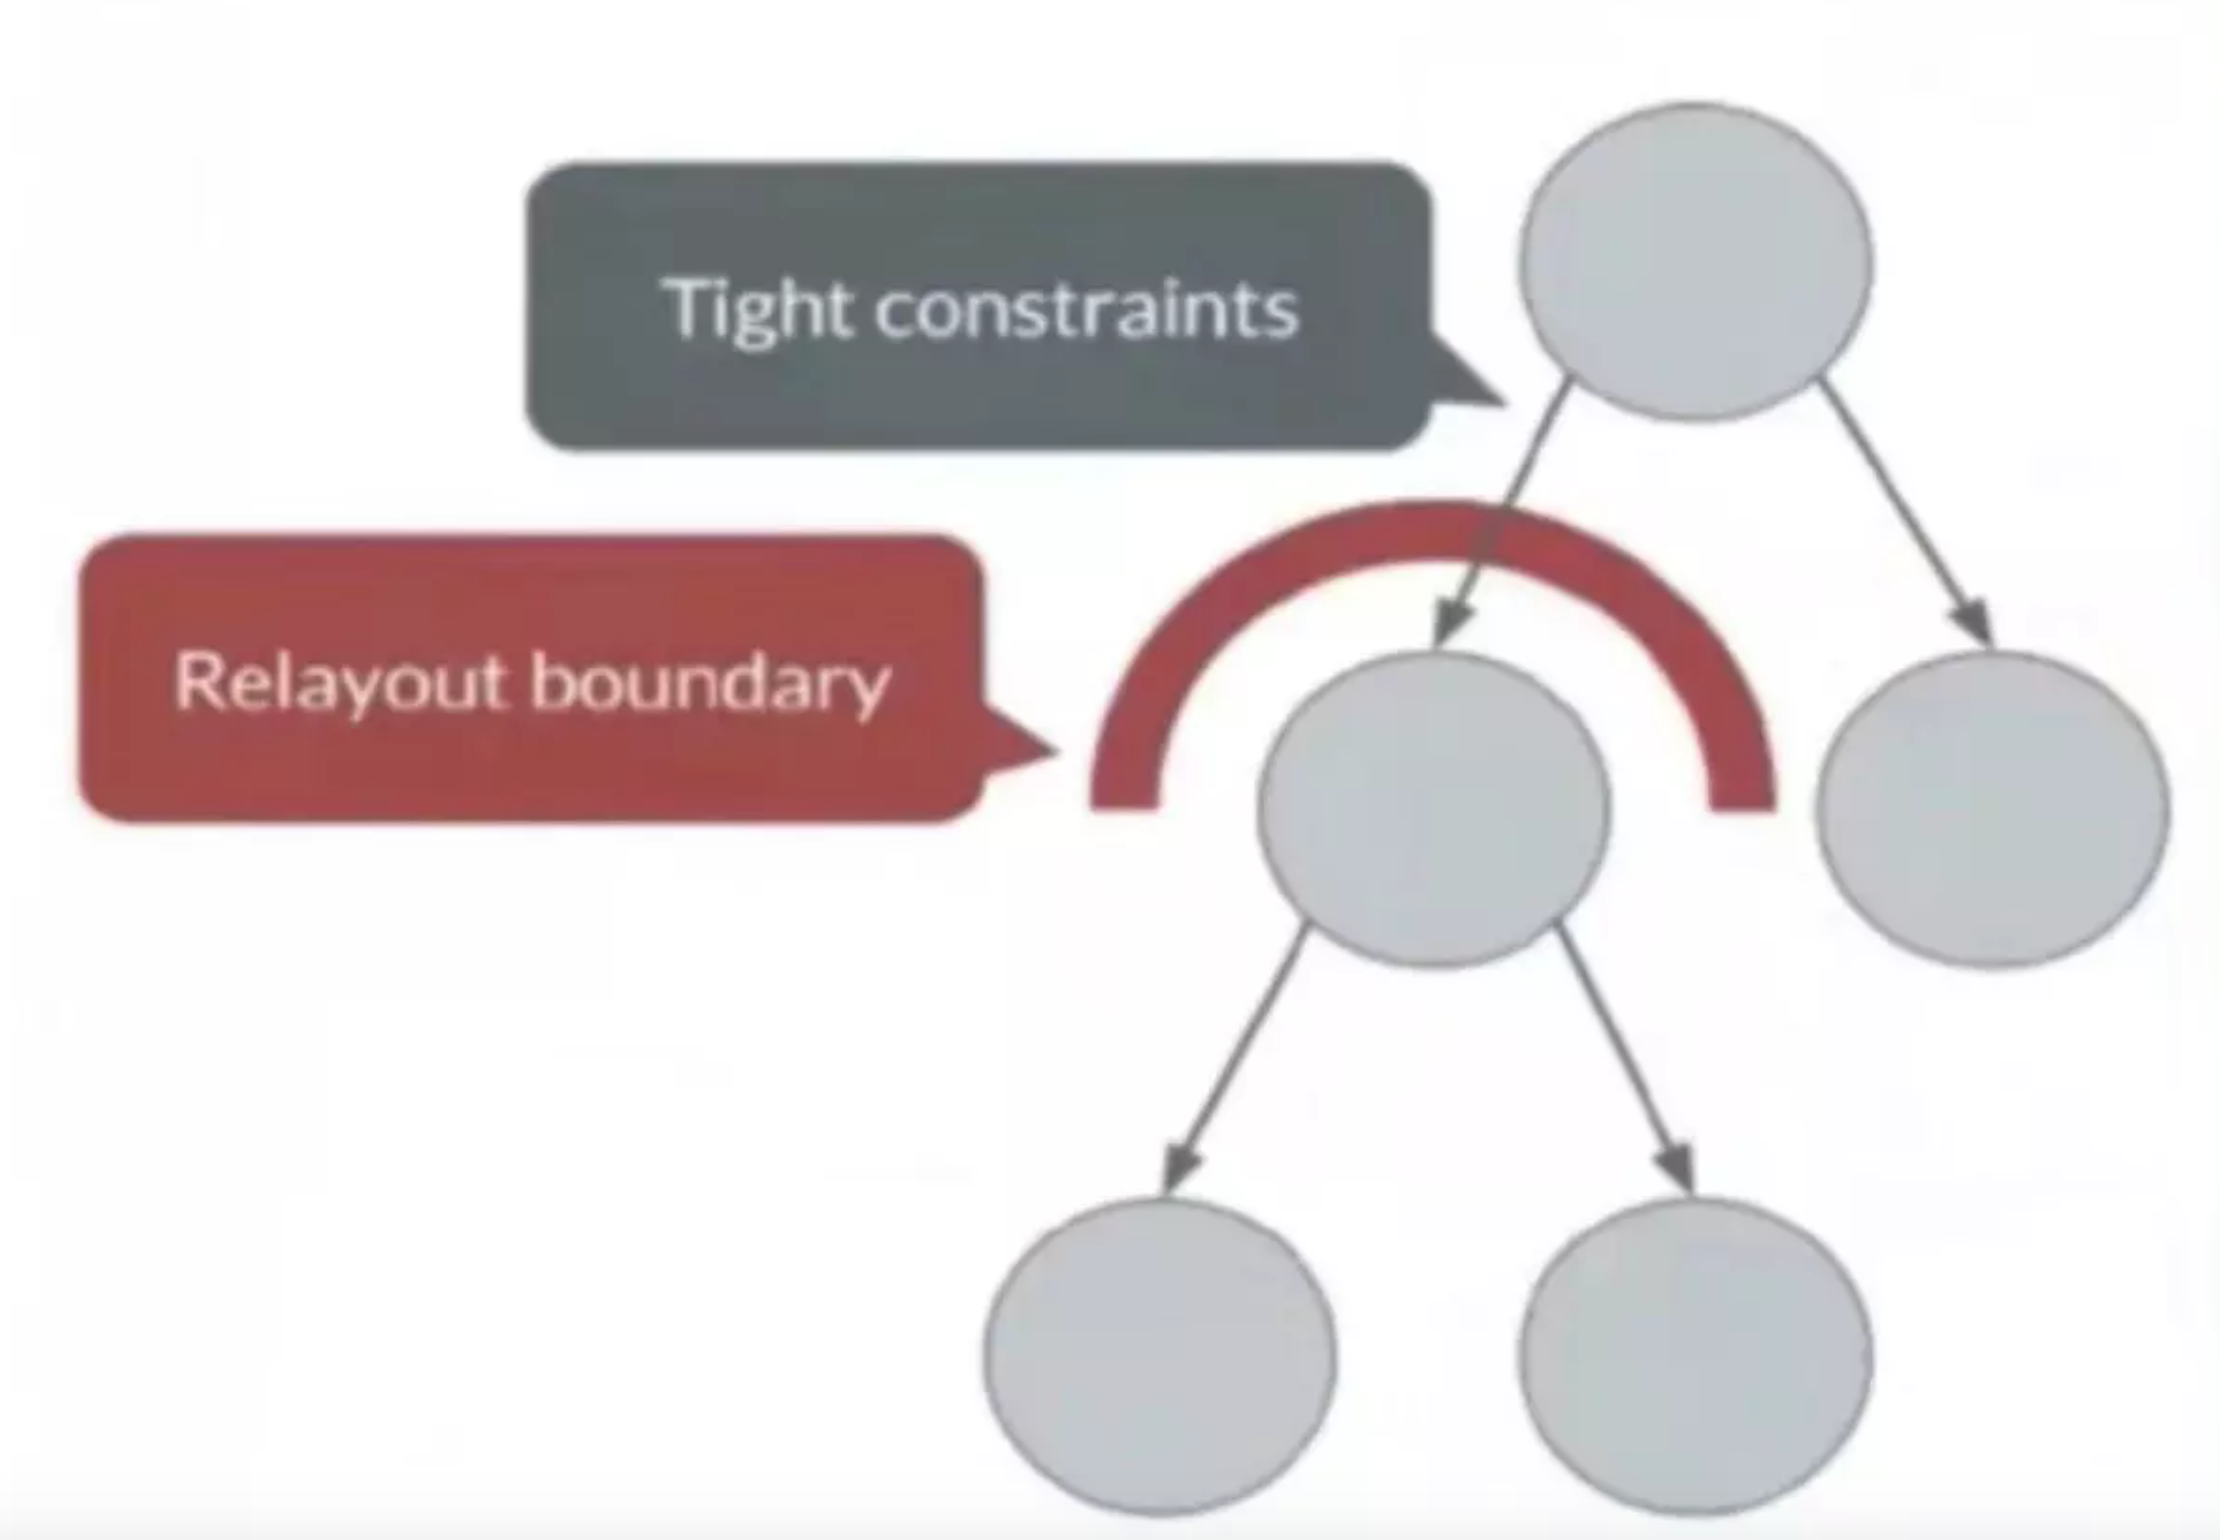
如图所示,子元素的布局信息不影响父元素的布局信息,这时候可以只遍历子树。 2、 停止树的遍历
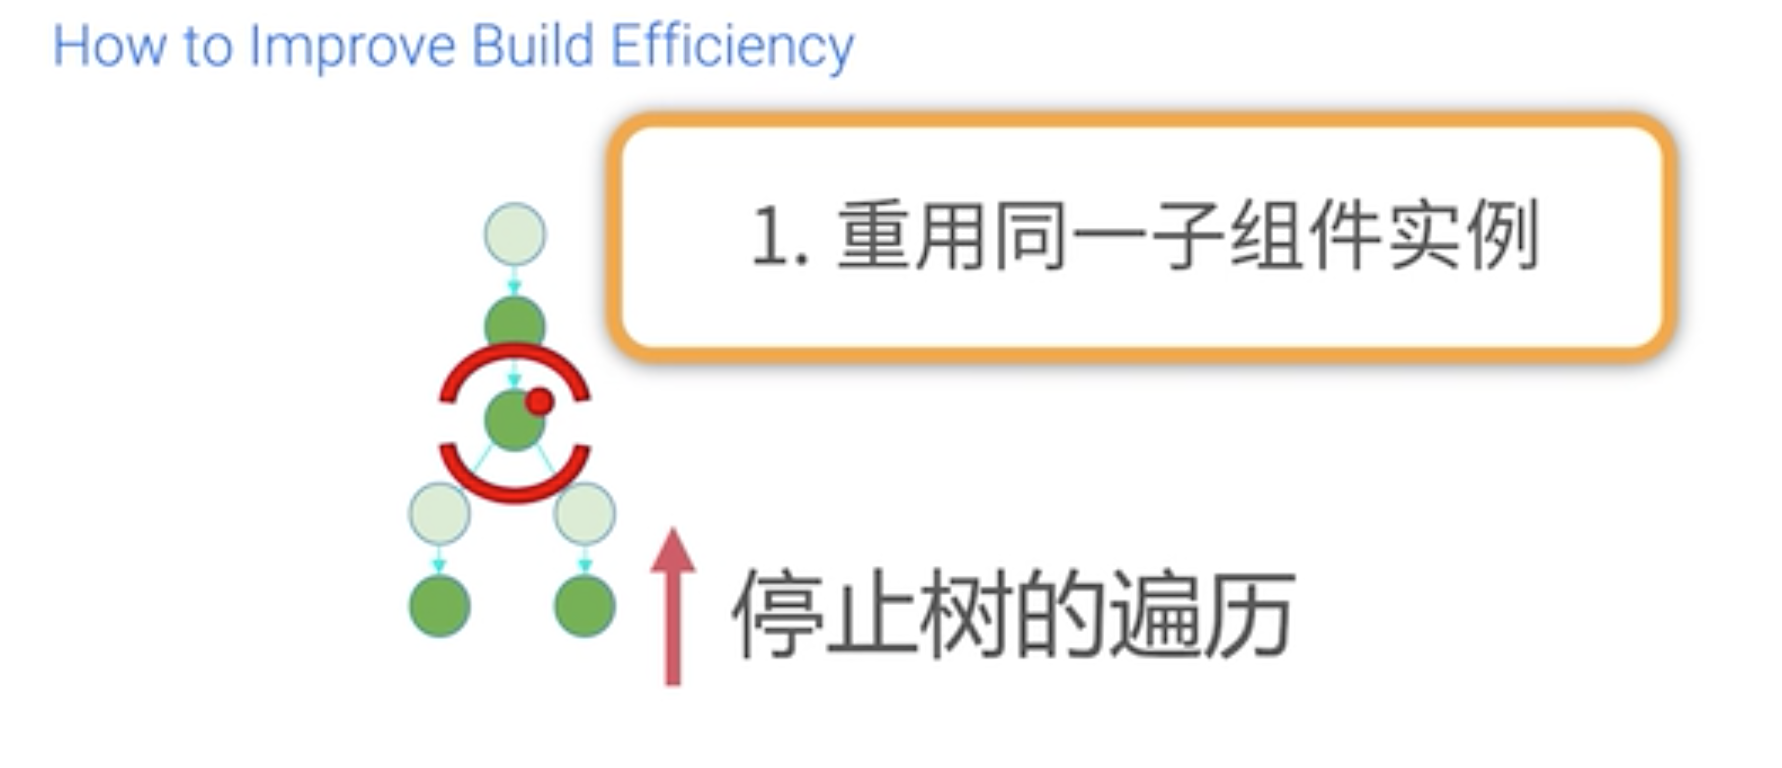
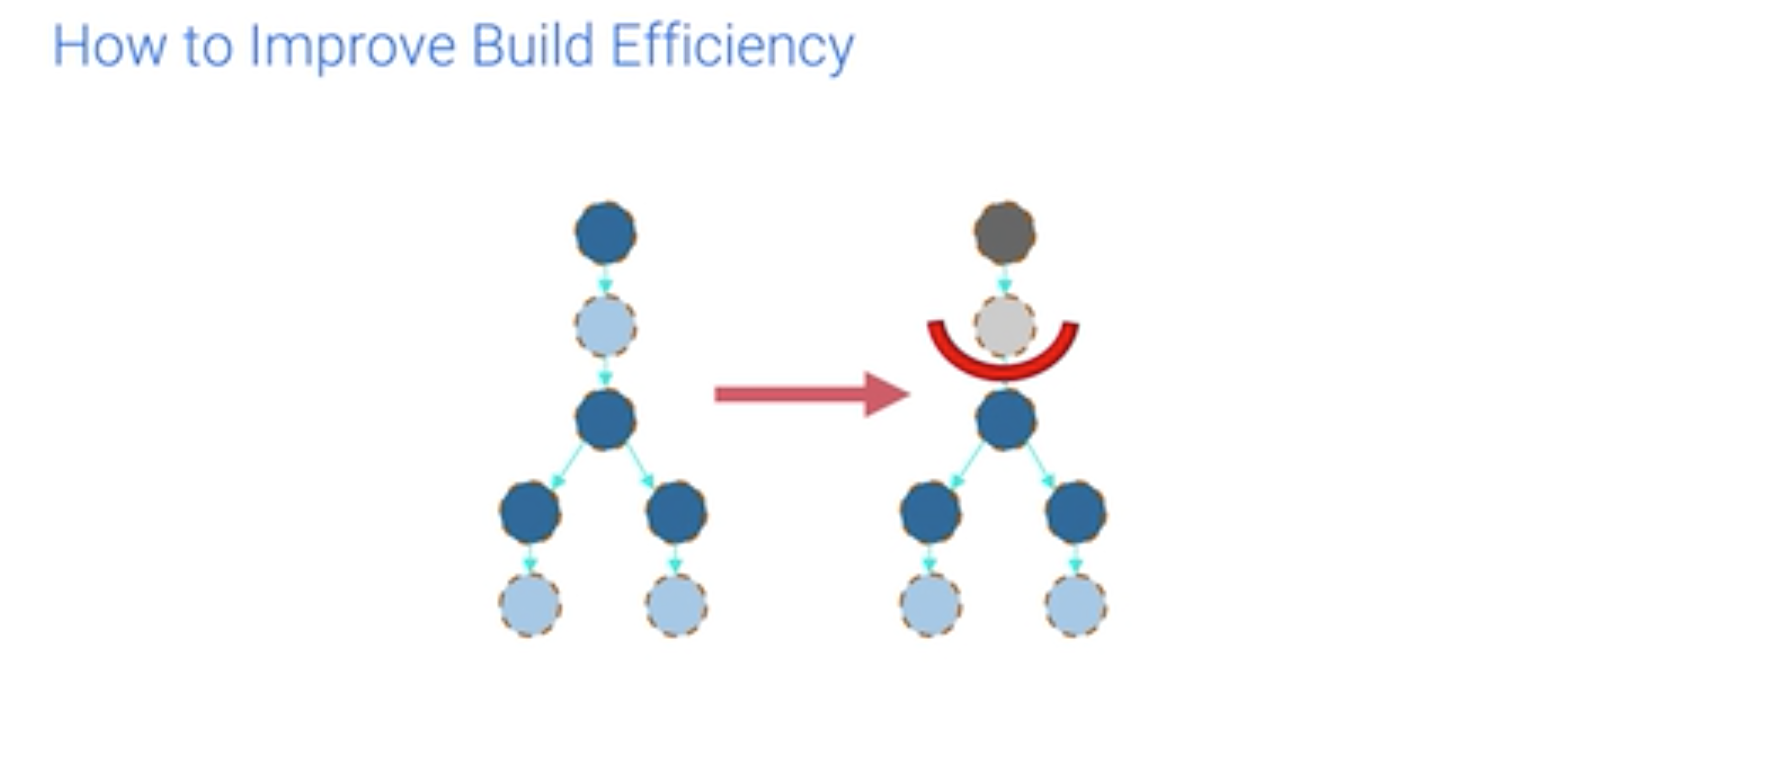
如果在做更新的时候,如果更新的界面不影响一部分子树的逻辑,可以把子树从前一帧切下来加到新一帧的下面,如图:
说完 RelayoutBoundary 与 layer 的关系我们继续来看代码:
PaintingContext._repaintCompositedChild
static void _repaintCompositedChild(
    RenderObject child, {
    bool debugAlsoPaintedParent = false,
    PaintingContext childContext,
  }) {

    OffsetLayer childLayer = child._layer;
    if (childLayer == null) {
      assert(debugAlsoPaintedParent);
      //为 RepaintBoundary 创建新的图层
      child._layer = childLayer = OffsetLayer();
    } else {
      childLayer.removeAllChildren();
    }

    childContext ??= PaintingContext(child._layer, child.paintBounds);
    child._paintWithContext(childContext, Offset.zero);

    // Double-check that the paint method did not replace the layer (the first
    // check is done in the [layer] setter itself).

    childContext.stopRecordingIfNeeded();
  }
_repaintCompositedChild 会先判断 child 的 layer。如果不存在,则创建一个新的 OffsetLayer,如果存在则清空 layer 的孩子节点。
这里创建的图层就是为有自己的 layer 而且还没有绘制过的 RenderObject 子树创建新的 layer。
_paintWithContext 会直接调用到我们熟悉的RenderObject.paint(context, offset),我们知道函数paint()由RenderObject子类自己实现。从之前的源码分析我们知道绘制起点都是“绘制边界”。这里我们就拿我们熟悉的一个“绘制边界”,RenderRepaintBoundary,为例来走一下绘制流程,它的绘制函数的实现在RenderProxyBoxMixin类中:
RenderObject.paint()
  @override
  void paint(PaintingContext context, Offset offset) {
    if (child != null)
      context.paintChild(child, offset);
  }
这里又回调了 PaintingContext 的 paintChild 方法。
PaintingContext.paintChild
 void paintChild(RenderObject child, Offset offset) {
    if (child.isRepaintBoundary) {
      stopRecordingIfNeeded();
      _compositeChild(child, offset);
    } else {
      child._paintWithContext(this, offset);
    }
  }
这里会检查子节点是不是绘制边界,如果不是的话,就是普通的绘制了,接着往下调用_paintWithContext(),继续往当前的PictureLayer上绘制。如果是的话就把当前的绘制先停掉。然后调用_compositeChild(child, offset);
  void _compositeChild(RenderObject child, Offset offset) {
    if (child._needsPaint) {
      repaintCompositedChild(child, debugAlsoPaintedParent: true);
    }
    child._layer.offset = offset;
    appendLayer(child._layer);
  }
如果这个子绘制边界被标记为需要重绘的话,那么就调用repaintCompositedChild()来重新生成图层然后重绘。如果这个子绘制边界没有被标记为需要重绘的话,就跳过了重新生成图层和重绘。最后 appendLayer 会把 child 的图层 append 到当前图层子图层链表中,形成 layer tree。
至此 paint 阶段我们就分析完了。
总结
- layer tree 的生成和 append 主要在 PaintingContext 中。
- repaintCompositedChild 方法为还没有 layer 的 RepaintBoundary 创建图层。
- PaintingContext._compositeChild 把 child 的图层 append 进来,形成 layer tree。