Recyclerview 推出已经很久了,之前一直局限在使用上没有深入学习它的源码,本系列从源码上分析它的绘制流程、缓存机制、动画机制等。先看一下它的绘制流程。
onMeasure
  @Override
    protected void onMeasure(int widthSpec, int heightSpec) {
        // 如果 LayoutManager 为 null 走 defaultOnMeasure
        if (mLayout == null) {
            defaultOnMeasure(widthSpec, heightSpec);
            return;
        }
        //LayoutManager 是否支持自动测量
        if (mLayout.isAutoMeasureEnabled()) {
            final int widthMode = MeasureSpec.getMode(widthSpec);
            final int heightMode = MeasureSpec.getMode(heightSpec);

            /**
             * This specific call should be considered deprecated and replaced with
             * {@link #defaultOnMeasure(int, int)}. It can't actually be replaced as it could
             * break existing third party code but all documentation directs developers to not
             * override {@link LayoutManager#onMeasure(int, int)} when
             * {@link LayoutManager#isAutoMeasureEnabled()} returns true.
             */
            mLayout.onMeasure(mRecycler, mState, widthSpec, heightSpec);

            final boolean measureSpecModeIsExactly =
                    widthMode == MeasureSpec.EXACTLY && heightMode == MeasureSpec.EXACTLY;
            //如果是 EXACTLY 模式且 adapter 不为 null 返回
            if (measureSpecModeIsExactly || mAdapter == null) {
                return;
            }

            if (mState.mLayoutStep == State.STEP_START) {
                dispatchLayoutStep1();
            }
            // set dimensions in 2nd step. Pre-layout should happen with old dimensions for
            // consistency
            mLayout.setMeasureSpecs(widthSpec, heightSpec);
            mState.mIsMeasuring = true;
            dispatchLayoutStep2();

            // now we can get the width and height from the children.
            mLayout.setMeasuredDimensionFromChildren(widthSpec, heightSpec);

            // if RecyclerView has non-exact width and height and if there is at least one child
            // which also has non-exact width & height, we have to re-measure.
            if (mLayout.shouldMeasureTwice()) {
                mLayout.setMeasureSpecs(
                        MeasureSpec.makeMeasureSpec(getMeasuredWidth(), MeasureSpec.EXACTLY),
                        MeasureSpec.makeMeasureSpec(getMeasuredHeight(), MeasureSpec.EXACTLY));
                mState.mIsMeasuring = true;
                dispatchLayoutStep2();
                // now we can get the width and height from the children.
                mLayout.setMeasuredDimensionFromChildren(widthSpec, heightSpec);
            }
        } else {
            if (mHasFixedSize) {
                mLayout.onMeasure(mRecycler, mState, widthSpec, heightSpec);
                return;
            }
            // custom onMeasure
            if (mAdapterUpdateDuringMeasure) {
                startInterceptRequestLayout();
                onEnterLayoutOrScroll();
                processAdapterUpdatesAndSetAnimationFlags();
                onExitLayoutOrScroll();

                if (mState.mRunPredictiveAnimations) {
                    mState.mInPreLayout = true;
                } else {
                    // consume remaining updates to provide a consistent state with the layout pass.
                    mAdapterHelper.consumeUpdatesInOnePass();
                    mState.mInPreLayout = false;
                }
                mAdapterUpdateDuringMeasure = false;
                stopInterceptRequestLayout(false);
            } else if (mState.mRunPredictiveAnimations) {
                // If mAdapterUpdateDuringMeasure is false and mRunPredictiveAnimations is true:
                // this means there is already an onMeasure() call performed to handle the pending
                // adapter change, two onMeasure() calls can happen if RV is a child of LinearLayout
                // with layout_width=MATCH_PARENT. RV cannot call LM.onMeasure() second time
                // because getViewForPosition() will crash when LM uses a child to measure.
                setMeasuredDimension(getMeasuredWidth(), getMeasuredHeight());
                return;
            }

            if (mAdapter != null) {
                mState.mItemCount = mAdapter.getItemCount();
            } else {
                mState.mItemCount = 0;
            }
            startInterceptRequestLayout();
            mLayout.onMeasure(mRecycler, mState, widthSpec, heightSpec);
            stopInterceptRequestLayout(false);
            mState.mInPreLayout = false; // clear
        }
    }
onMeasure 的全部源码如上,下面我们一步步分析下它:
if (mLayout == null) {
    defaultOnMeasure(widthSpec, heightSpec);
    return;
}
首先是没有设置 LayoutManager 的情况,在开发中我们可能遇到过这种情况,忘了设置 LayoutManager。此时:
- 页面一片空白
- log 中输出一下提示:E/RecyclerView: No layout manager attached; skipping layout
我们继续,看一下 defaultOnMeasure:
    void defaultOnMeasure(int widthSpec, int heightSpec) {

        final int width = LayoutManager.chooseSize(widthSpec,
                getPaddingLeft() + getPaddingRight(),
                ViewCompat.getMinimumWidth(this));
        final int height = LayoutManager.chooseSize(heightSpec,
                getPaddingTop() + getPaddingBottom(),
                ViewCompat.getMinimumHeight(this));

        setMeasuredDimension(width, height);
    }
其实如果 LayoutManager 测量模式为 auto,走的也是 defaultOnMeasure,这里通过 LayoutManager 的 chooseSize 为 RecyclerView 计算出合适的尺寸。
RecyclerView#LayoutManager#chooseSize
public static int chooseSize(int spec, int desired, int min) {
            final int mode = View.MeasureSpec.getMode(spec);
            final int size = View.MeasureSpec.getSize(spec);
            switch (mode) {
                case View.MeasureSpec.EXACTLY:
                    return size;
                case View.MeasureSpec.AT_MOST:
                    return Math.min(size, Math.max(desired, min));
                case View.MeasureSpec.UNSPECIFIED:
                default:
                    return Math.max(desired, min);
            }
        }
继续回到 onMeasure,接下来是一个判断:
if (mLayout.isAutoMeasureEnabled())
目前官方提供的三个 LayoutManager 的 mAutoMeasure 都是 true。在这里:
- 如果 mAutoMeasure 为真,走 defaultOnMeasure 。
- 如果 mAutoMeasure 为假,走 LayoutManager 的 onMeasure。
mAutoMeasure 不为真的情况我们我们就不分析了,这种需要在自定义 LayoutManager 的时候根据情况复写自定义 LayoutManager 的 onMeasure。
接着再往下,我们发现它还是走的
/**
             * This specific call should be considered deprecated and replaced with
             * {@link #defaultOnMeasure(int, int)}. It can't actually be replaced as it could
             * break existing third party code but all documentation directs developers to not
             * override {@link LayoutManager#onMeasure(int, int)} when
             * {@link LayoutManager#isAutoMeasureEnabled()} returns true.
             */
mLayout.onMeasure(mRecycler, mState, widthSpec, heightSpec);
不过它有一段注释,大意是:
这种写法应该被废弃,只是为了兼容一些第三方的代码才这样写。如果 isAutoMeasureEnabled() 返回 true ,请不要复写 LayoutManager 的 onMeasure。
继续往下:
            final boolean measureSpecModeIsExactly =
                    widthMode == MeasureSpec.EXACTLY && heightMode == MeasureSpec.EXACTLY;
            if (measureSpecModeIsExactly || mAdapter == null) {
                return;
            }
如果测量模式是 EXACTLY 直接返回,测量模式是 EXACTLY 的情况下,控件可以得到它想要的 size,这时候不必继续测量下去,返回进行布局。
继续:
 if (mState.mLayoutStep == State.STEP_START) {
                dispatchLayoutStep1();
            }
            // set dimensions in 2nd step. Pre-layout should happen with old dimensions for
            // consistency
            mLayout.setMeasureSpecs(widthSpec, heightSpec);
            mState.mIsMeasuring = true;
            dispatchLayoutStep2();

            // now we can get the width and height from the children.
            mLayout.setMeasuredDimensionFromChildren(widthSpec, heightSpec);
dispatchLayoutStep1() 主要进行一些动画的准备,这不是我们今天的重点,先跳过,在分析动画的时候再分析。 dispatchLayoutStep2() 是主要的布局阶段,我们详细看一下它:
 /**
     * The second layout step where we do the actual layout of the views for the final state.
     * This step might be run multiple times if necessary (e.g. measure).
     */
    private void dispatchLayoutStep2() {
        //禁止子 View 的 requestLayout() 操作。
        startInterceptRequestLayout();
        onEnterLayoutOrScroll();
        mState.assertLayoutStep(State.STEP_LAYOUT | State.STEP_ANIMATIONS);
        mAdapterHelper.consumeUpdatesInOnePass();
        //获取 item 数量
        mState.mItemCount = mAdapter.getItemCount();
        mState.mDeletedInvisibleItemCountSincePreviousLayout = 0;

        // Step 2: Run layout
        mState.mInPreLayout = false;
        //调用 layoutManager 布局 children
        mLayout.onLayoutChildren(mRecycler, mState);

        mState.mStructureChanged = false;
        mPendingSavedState = null;

        // onLayoutChildren may have caused client code to disable item animations; re-check
        mState.mRunSimpleAnimations = mState.mRunSimpleAnimations && mItemAnimator != null;
        mState.mLayoutStep = State.STEP_ANIMATIONS;
        onExitLayoutOrScroll();
        stopInterceptRequestLayout(false);
    }
真正的布局 children 是调用的 LayoutManager 的 onLayoutChildren,这也是为什么不同的 LayoutManager 可以有不同的布局效果。 这里我们进入 LayoutManager 看一下(本文分析的是 LinearLayoutManager)。
LinearLayoutManager#onLayoutChildren
    public void onLayoutChildren(RecyclerView.Recycler recycler, RecyclerView.State state) {
        // layout algorithm:
        // 布局算法
        // 1) by checking children and other variables, find an anchor coordinate and an anchor
        //  item position.
        // 1) 寻找锚点
        // 2) fill towards start, stacking from bottom
        // 2) 向上填充
        // 3) fill towards end, stacking from top
        // 3) 向下填充
        // 4) scroll to fulfill requirements like stack from bottom.
        // create layout state

        ...

        // resolve layout direction
        // 判断绘制方向
        resolveShouldLayoutReverse();

        final View focused = getFocusedChild();
        //mValid的默认值是false,一次测量之后设为true,onLayout完成后会回调执行reset方法,又变为false
        if (!mAnchorInfo.mValid || mPendingScrollPosition != RecyclerView.NO_POSITION
                || mPendingSavedState != null) {
            mAnchorInfo.reset();
            // 判断绘制方向
            mAnchorInfo.mLayoutFromEnd = mShouldReverseLayout ^ mStackFromEnd;
            // calculate anchor position and coordinate
            updateAnchorInfoForLayout(recycler, state, mAnchorInfo);
            mAnchorInfo.mValid = true;
        } else if (focused != null && (mOrientationHelper.getDecoratedStart(focused)
                        >= mOrientationHelper.getEndAfterPadding()
                || mOrientationHelper.getDecoratedEnd(focused)
                <= mOrientationHelper.getStartAfterPadding())) {
            ...
        }
        ...
        onAnchorReady(recycler, state, mAnchorInfo, firstLayoutDirection);
        detachAndScrapAttachedViews(recycler);
        mLayoutState.mInfinite = resolveIsInfinite();
        mLayoutState.mIsPreLayout = state.isPreLayout();
        if (mAnchorInfo.mLayoutFromEnd) {
            // 根据布局方向等更新 LayoutState
            updateLayoutStateToFillStart(mAnchorInfo);
            mLayoutState.mExtra = extraForStart;
            // 布局 item
            fill(recycler, mLayoutState, state, false);
            startOffset = mLayoutState.mOffset;
            final int firstElement = mLayoutState.mCurrentPosition;
            if (mLayoutState.mAvailable > 0) {
                extraForEnd += mLayoutState.mAvailable;
            }
            // 根据布局方向等更新 LayoutState
            updateLayoutStateToFillEnd(mAnchorInfo);
            mLayoutState.mExtra = extraForEnd;
            mLayoutState.mCurrentPosition += mLayoutState.mItemDirection;
            // 布局 item
            fill(recycler, mLayoutState, state, false);
            endOffset = mLayoutState.mOffset;

            ...
        } else {
            // 根据布局方向等更新 LayoutState
            updateLayoutStateToFillEnd(mAnchorInfo);
            mLayoutState.mExtra = extraForEnd;
            // 布局item
            fill(recycler, mLayoutState, state, false);
            endOffset = mLayoutState.mOffset;
            final int lastElement = mLayoutState.mCurrentPosition;
            if (mLayoutState.mAvailable > 0) {
                extraForStart += mLayoutState.mAvailable;
            }
            // 根据布局方向等更新 LayoutState
            updateLayoutStateToFillStart(mAnchorInfo);
            mLayoutState.mExtra = extraForStart;
            mLayoutState.mCurrentPosition += mLayoutState.mItemDirection;
            // 布局 item
            fill(recycler, mLayoutState, state, false);
            startOffset = mLayoutState.mOffset;

            ...
        }

       ...
        layoutForPredictiveAnimations(recycler, state, startOffset, endOffset);
        if (!state.isPreLayout()) {
            mOrientationHelper.onLayoutComplete();
        } else {
            mAnchorInfo.reset();
        }
        mLastStackFromEnd = mStackFromEnd;
        if (DEBUG) {
            validateChildOrder();
        }
    }
以上是 onLayoutChildren 的代码,它主要分为三个步骤:
-
- 寻找锚点
-
- 根据锚点和绘制方向更新 LayoutState
-
- 布局 item
接下来一步步看源码:
寻找锚点
        // 判断绘制方向
        resolveShouldLayoutReverse();

        final View focused = getFocusedChild();
        //mValid的默认值是false,一次测量之后设为true,onLayout完成后会回调执行reset方法,又变为false
        if (!mAnchorInfo.mValid || mPendingScrollPosition != RecyclerView.NO_POSITION
                || mPendingSavedState != null) {
            mAnchorInfo.reset();
            // 判断绘制方向
            mAnchorInfo.mLayoutFromEnd = mShouldReverseLayout ^ mStackFromEnd;
            // calculate anchor position and coordinate
            updateAnchorInfoForLayout(recycler, state, mAnchorInfo);
            mAnchorInfo.mValid = true;
        } else if (focused != null && (mOrientationHelper.getDecoratedStart(focused)
                        >= mOrientationHelper.getEndAfterPadding()
                || mOrientationHelper.getDecoratedEnd(focused)
                <= mOrientationHelper.getStartAfterPadding())) {
            ...
        }
判断绘制方向的时候有一个异或运算:
mAnchorInfo.mLayoutFromEnd = mShouldReverseLayout ^ mStackFromEnd;
mReverseLayout 和 mStackFromEnd 这两个参数要说明一下:
- mStackFromEnd 不改变 item 方向,但是从尾部开始显示。
- mReverseLayout 改变元素显示顺序
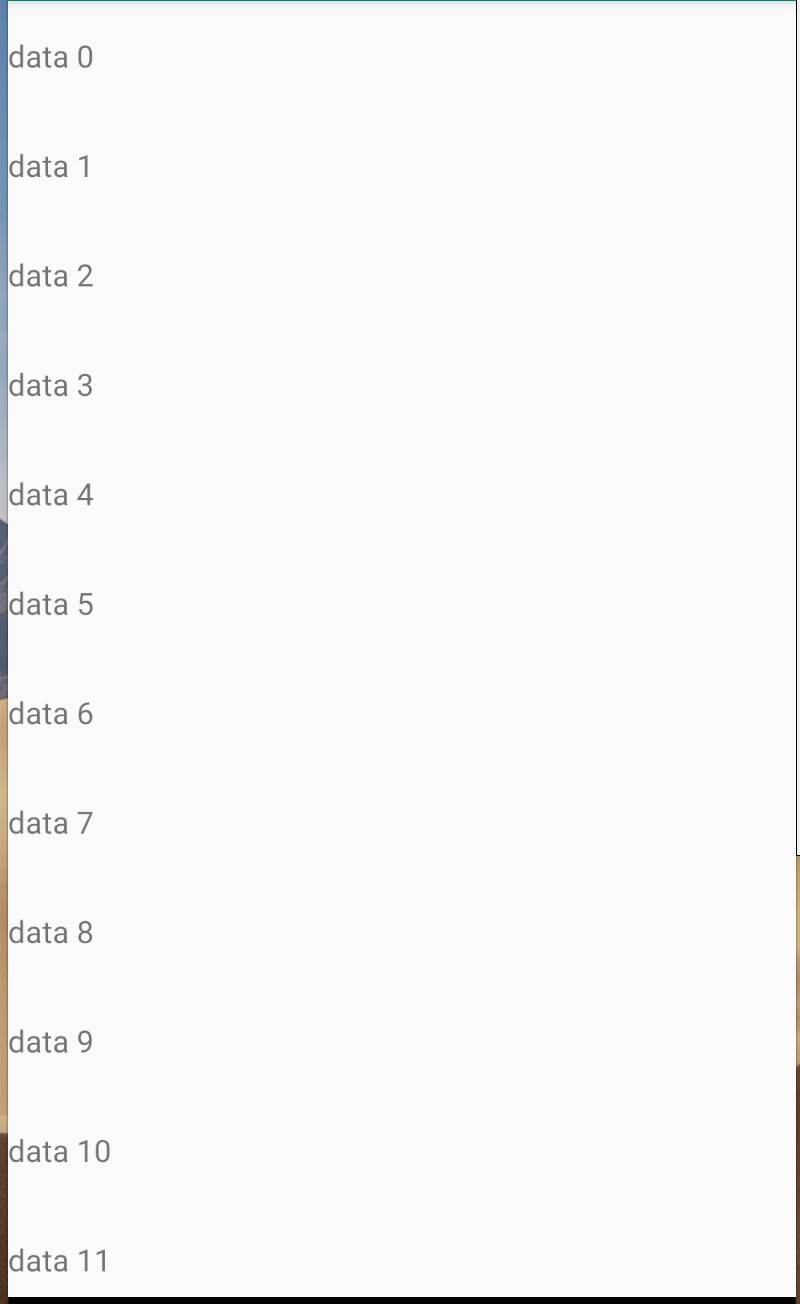
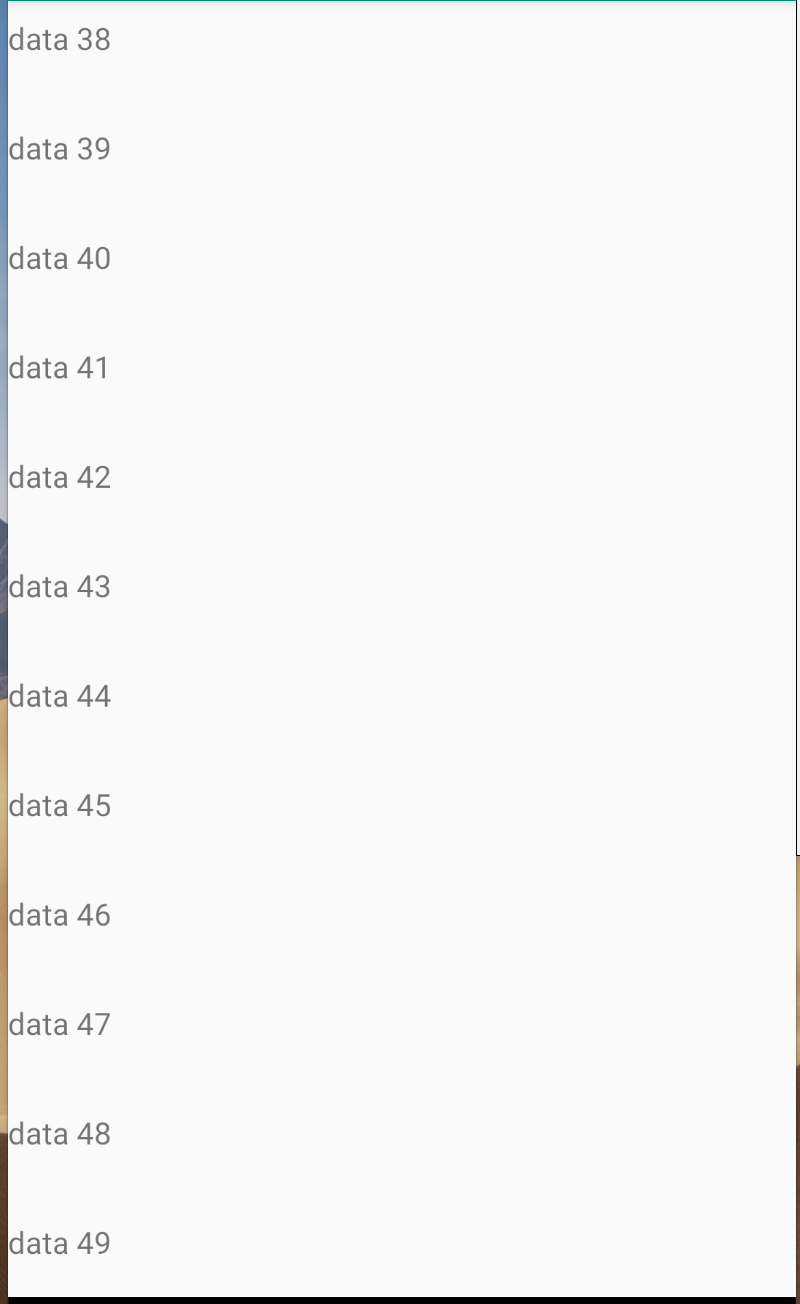
一下分别是正常情况,设置 mStackFromEnd 为 true 和 mReverseLayout 为 true 的效果。

接下来就是锚点信息的确定,比较复杂,这里就不分析了,接下来就是 item 的布局:
{
            updateLayoutStateToFillStart(mAnchorInfo);
            mLayoutState.mExtra = extraForStart;
            fill(recycler, mLayoutState, state, false);
            startOffset = mLayoutState.mOffset;
            final int firstElement = mLayoutState.mCurrentPosition;
            if (mLayoutState.mAvailable > 0) {
                extraForEnd += mLayoutState.mAvailable;
            }
            updateLayoutStateToFillEnd(mAnchorInfo);
            mLayoutState.mExtra = extraForEnd;
            mLayoutState.mCurrentPosition += mLayoutState.mItemDirection;
            fill(recycler, mLayoutState, state, false);
            endOffset = mLayoutState.mOffset;

            if (mLayoutState.mAvailable > 0) {
                // end could not consume all. add more items towards start
                extraForStart = mLayoutState.mAvailable;
                updateLayoutStateToFillStart(firstElement, startOffset);
                mLayoutState.mExtra = extraForStart;
                fill(recycler, mLayoutState, state, false);
                startOffset = mLayoutState.mOffset;
            }
        }
主要有两个步骤:
- 1、 updateLayoutStateToFillStart(mAnchorInfo); 更新 LayoutState 信息
- 2、 fill(recycler, mLayoutState, state, false); 布局 item。 可以看到至少会调用两次 fill 当有剩余空间的时候还会在调用一次。我们来看下它:
int fill(RecyclerView.Recycler recycler, LayoutState layoutState,
            RecyclerView.State state, boolean stopOnFocusable) {
        ...
        while ((layoutState.mInfinite || remainingSpace > 0) && layoutState.hasMore(state)) {
            ...
            layoutChunk(recycler, state, layoutState, layoutChunkResult);
            ...
        }

        return start - layoutState.mAvailable;
    }
这个方法的注释是:
The magic functions :). Fills the given layout, defined by the layoutState. This is fairly independent from the rest of the {@link LinearLayoutManager} and with little change, can be made publicly available as a helper class.
简单翻译一下:
魔法函数,根据 layoutstate 填充指定的 layout。这个函数完全独立于 LinearLayoutManager,只需要很小的改变它就能成为一个公共的帮助类。
fill 里又调用了 layoutChunk:
 void layoutChunk(RecyclerView.Recycler recycler, RecyclerView.State state,
            LayoutState layoutState, LayoutChunkResult result) {
        View view = layoutState.next(recycler);
        if (view == null) {
            if (DEBUG && layoutState.mScrapList == null) {
                throw new RuntimeException("received null view when unexpected");
            }
            // if we are laying out views in scrap, this may return null which means there is
            // no more items to layout.
            result.mFinished = true;
            return;
        }
        RecyclerView.LayoutParams params = (RecyclerView.LayoutParams) view.getLayoutParams();
        if (layoutState.mScrapList == null) {
            if (mShouldReverseLayout == (layoutState.mLayoutDirection
                    == LayoutState.LAYOUT_START)) {
                addView(view);
            } else {
                addView(view, 0);
            }
        } else {
            if (mShouldReverseLayout == (layoutState.mLayoutDirection
                    == LayoutState.LAYOUT_START)) {
                addDisappearingView(view);
            } else {
                addDisappearingView(view, 0);
            }
        }
        measureChildWithMargins(view, 0, 0);
        result.mConsumed = mOrientationHelper.getDecoratedMeasurement(view);
        int left, top, right, bottom;
        if (mOrientation == VERTICAL) {
            if (isLayoutRTL()) {
                right = getWidth() - getPaddingRight();
                left = right - mOrientationHelper.getDecoratedMeasurementInOther(view);
            } else {
                left = getPaddingLeft();
                right = left + mOrientationHelper.getDecoratedMeasurementInOther(view);
            }
            if (layoutState.mLayoutDirection == LayoutState.LAYOUT_START) {
                bottom = layoutState.mOffset;
                top = layoutState.mOffset - result.mConsumed;
            } else {
                top = layoutState.mOffset;
                bottom = layoutState.mOffset + result.mConsumed;
            }
        } else {
            top = getPaddingTop();
            bottom = top + mOrientationHelper.getDecoratedMeasurementInOther(view);

            if (layoutState.mLayoutDirection == LayoutState.LAYOUT_START) {
                right = layoutState.mOffset;
                left = layoutState.mOffset - result.mConsumed;
            } else {
                left = layoutState.mOffset;
                right = layoutState.mOffset + result.mConsumed;
            }
        }
        // We calculate everything with View's bounding box (which includes decor and margins)
        // To calculate correct layout position, we subtract margins.
        layoutDecoratedWithMargins(view, left, top, right, bottom);
        if (DEBUG) {
            Log.d(TAG, "laid out child at position " + getPosition(view) + ", with l:"
                    + (left + params.leftMargin) + ", t:" + (top + params.topMargin) + ", r:"
                    + (right - params.rightMargin) + ", b:" + (bottom - params.bottomMargin));
        }
        // Consume the available space if the view is not removed OR changed
        if (params.isItemRemoved() || params.isItemChanged()) {
            result.mIgnoreConsumed = true;
        }
        result.mFocusable = view.hasFocusable();
    }
layoutChunk 主要做三件事:
- View view = layoutState.next(recycler); 获取 itemView。
- measureChildWithMargins(view, 0, 0); measure child view。
- layoutDecoratedWithMargins(view, left, top, right, bottom);布局装饰后的 itemView。
首先我们看 LayoutState.next:
View next(RecyclerView.Recycler recycler) {
            if (mScrapList != null) {
                return nextViewFromScrapList();
            }
            final View view = recycler.getViewForPosition(mCurrentPosition);
            mCurrentPosition += mItemDirection;
            return view;
        }
Recycler#getViewForPosition
@NonNull
        public View getViewForPosition(int position) {
            return getViewForPosition(position, false);
        }

        View getViewForPosition(int position, boolean dryRun) {
            return tryGetViewHolderForPositionByDeadline(position, dryRun, FOREVER_NS).itemView;
        }
最终是从 tryGetViewHolderForPositionByDeadline 获取 itemView,这个方法代码量有点多,我们分析 Recycler 缓存的时候再去分析它。
继续回到 layoutChunk 拿到 view 之后是 addView,再之后是 measureChildWithMargins:
public void measureChildWithMargins(@NonNull View child, int widthUsed, int heightUsed) {
            final LayoutParams lp = (LayoutParams) child.getLayoutParams();

            final Rect insets = mRecyclerView.getItemDecorInsetsForChild(child);
            widthUsed += insets.left + insets.right;
            heightUsed += insets.top + insets.bottom;

            final int widthSpec = getChildMeasureSpec(getWidth(), getWidthMode(),
                    getPaddingLeft() + getPaddingRight()
                            + lp.leftMargin + lp.rightMargin + widthUsed, lp.width,
                    canScrollHorizontally());
            final int heightSpec = getChildMeasureSpec(getHeight(), getHeightMode(),
                    getPaddingTop() + getPaddingBottom()
                            + lp.topMargin + lp.bottomMargin + heightUsed, lp.height,
                    canScrollVertically());
            if (shouldMeasureChild(child, widthSpec, heightSpec, lp)) {
                child.measure(widthSpec, heightSpec);
            }
        }
这个方法里我们看到了子 View 的测量,这里有一个要注意的地方:getItemDecorInsetsForChild
Rect getItemDecorInsetsForChild(View child) {
        final LayoutParams lp = (LayoutParams) child.getLayoutParams();
        if (!lp.mInsetsDirty) {
            return lp.mDecorInsets;
        }

        if (mState.isPreLayout() && (lp.isItemChanged() || lp.isViewInvalid())) {
            // changed/invalid items should not be updated until they are rebound.
            return lp.mDecorInsets;
        }
        final Rect insets = lp.mDecorInsets;
        insets.set(0, 0, 0, 0);
        final int decorCount = mItemDecorations.size();
        for (int i = 0; i < decorCount; i++) {
            mTempRect.set(0, 0, 0, 0);
            mItemDecorations.get(i).getItemOffsets(mTempRect, child, this, mState);
            insets.left += mTempRect.left;
            insets.top += mTempRect.top;
            insets.right += mTempRect.right;
            insets.bottom += mTempRect.bottom;
        }
        lp.mInsetsDirty = false;
        return insets;
    }
这里其实是在测量 view 的时候加上,ItemDecoration 时设置的边距。
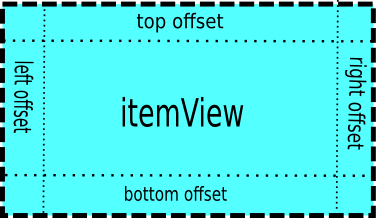
测量之后紧接着就走了 layoutDecoratedWithMargins 完成了 itemView 的布局。
到这里 onMeasure 基本上就讲完了。 还有两个问题:
- 为什么在 onMeasure 里进行布局。
- 测量模式不是 EXACTLY 的情况下,RecyclerView 什么时候完成自己 size 的测量。
我们再回到 onMeasure,dispatchLayoutStep2() 之后有这么一行:
  // now we can get the width and height from the children.
  mLayout.setMeasuredDimensionFromChildren(widthSpec, heightSpec);


  void setMeasuredDimensionFromChildren(int widthSpec, int heightSpec) {
            final int count = getChildCount();
            if (count == 0) {
                mRecyclerView.defaultOnMeasure(widthSpec, heightSpec);
                return;
            }
            int minX = Integer.MAX_VALUE;
            int minY = Integer.MAX_VALUE;
            int maxX = Integer.MIN_VALUE;
            int maxY = Integer.MIN_VALUE;

            for (int i = 0; i < count; i++) {
                View child = getChildAt(i);
                final Rect bounds = mRecyclerView.mTempRect;
                getDecoratedBoundsWithMargins(child, bounds);
                if (bounds.left < minX) {
                    minX = bounds.left;
                }
                if (bounds.right > maxX) {
                    maxX = bounds.right;
                }
                if (bounds.top < minY) {
                    minY = bounds.top;
                }
                if (bounds.bottom > maxY) {
                    maxY = bounds.bottom;
                }
            }
            mRecyclerView.mTempRect.set(minX, minY, maxX, maxY);
            setMeasuredDimension(mRecyclerView.mTempRect, widthSpec, heightSpec);
        }
在测量模式不是 EXACTLY 直接用 ItemView 填充可用空间,在填充完之后再根据 ItemView 占用的空间设置 MeasuredDimension。
onMeasure 分析完了,我们看下 onLayout。
onLayout
    @Override
    protected void onLayout(boolean changed, int l, int t, int r, int b) {
        TraceCompat.beginSection(TRACE_ON_LAYOUT_TAG);
        dispatchLayout();
        TraceCompat.endSection();
        mFirstLayoutComplete = true;
    }
void dispatchLayout() {
        if (mAdapter == null) {
            Log.e(TAG, "No adapter attached; skipping layout");
            // leave the state in START
            return;
        }
        if (mLayout == null) {
            Log.e(TAG, "No layout manager attached; skipping layout");
            // leave the state in START
            return;
        }
        mState.mIsMeasuring = false;
        if (mState.mLayoutStep == State.STEP_START) {
            dispatchLayoutStep1();
            mLayout.setExactMeasureSpecsFrom(this);
            dispatchLayoutStep2();
        } else if (mAdapterHelper.hasUpdates() || mLayout.getWidth() != getWidth()
                || mLayout.getHeight() != getHeight()) {
            // First 2 steps are done in onMeasure but looks like we have to run again due to
            // changed size.
            mLayout.setExactMeasureSpecsFrom(this);
            dispatchLayoutStep2();
        } else {
            // always make sure we sync them (to ensure mode is exact)
            mLayout.setExactMeasureSpecsFrom(this);
        }
        dispatchLayoutStep3();
    }
结合上面的 onMeasure ,如果测量模式为 Exactly ,这里 State step 为 STEP_START 仍然会进行 dispatchLayoutStep1 和 dispatchLayoutStep2。